

Stainless Steel Casting Supplier Shares Proven Ways to Ensure Quality and Durability
2026-11-16
Every stainless steel casting is only as strong as the process behind it. Yet too many buyers discover hidden flaws only after installation. Supreme Machinery, a supplier known for demanding applications, takes a different approach. Here are the proven ways they lock in quality and durability from the first pour to final inspection.
Why Tight Chromium and Nickel Ratios Keep Castings Sound
In stainless and heat-resistant cast alloys, chromium and nickel do more than determine grade. They control the solidification path and the phases that form at the last moment of freezing. When the chromium-to-nickel ratio is held intentionally tight, the alloy tends to solidify as a largely austenitic structure with a controlled amount of ferrite. That small ferrite fraction is essential: it dissolves tramp elements such as sulfur and phosphorus, preventing them from forming low-melting films along grain boundaries. Without this balance, fully austenitic grades become highly susceptible to hot tearing and intergranular cracking, especially in sections with abrupt thickness changes or restrained shrinkage.
A tight ratio also limits the drift toward excessive ferrite, which has its own drawbacks. High ferrite levels can promote sigma phase embrittlement during service at elevated temperatures or during post-weld heat treatment. By keeping chromium and nickel within a narrow band, foundries can avoid both the hot-shortness of fully austenitic structures and the embrittlement of heavily ferritic ones. The practical benefit appears in sounder castings with fewer centerline shrinkage defects, reduced weld repair rates, and more predictable mechanical properties from pour to pour.
From a production standpoint, a narrow ratio is not simply a chemist's preference. It supports consistent feeding behavior because the alloy freezes over a shorter temperature range when the phase balance is right. This reduces the risk of dispersed microporosity in bosses, flanges, and isolated heavy sections. For customers, the result is a casting that machines cleanly and holds pressure, with fewer rejections caused by leaks or sub-surface cracks. In short, the discipline of controlling chromium and nickel ratios turns metallurgical theory into a reliable quality advantage on the foundry floor.
Pouring Temperatures and Cooling Curves That Prevent Micro-Cracks
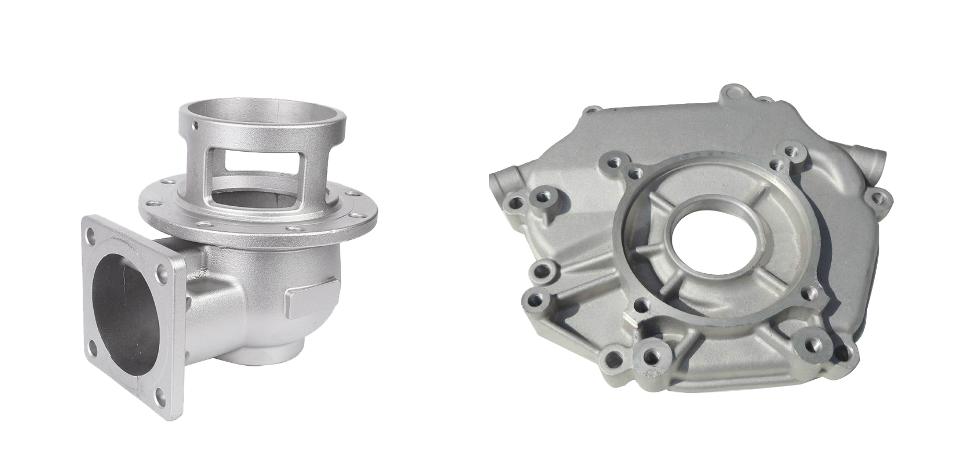
Pouring temperature is not just a number on a gauge — it is the first handshake between molten metal and the mold's inner surface. Too hot, and the alloy pulls away unevenly as it shrinks, inviting hairline fractures along grain boundaries. Too cold, and the metal freezes before it can fill thin sections, leaving cold shuts that later open under stress. The sweet spot lies in a narrow band where the liquid feeds the casting's deepest corners yet still allows a controlled, directional solidification. Most micro-cracks originate in that fragile moment when the casting moves from a fully liquid to a mushy, semi-solid state. Keeping the pour temperature within a tolerance of ±5°C — not the ±15°C often seen on shop-floor charts — gives the metal enough time to rearrange its atoms into a less brittle pattern.
Cooling curves matter just as much as the pour itself. A steep drop right after solidification begins can lock in residual stresses that manifest as invisible cracks days or even weeks later. The better practice is to stage the cooling: hold the casting near the solidus temperature for a short soak, then release heat gradually. This lets the crystal lattice relax instead of fighting its own contraction. We have found that a two-step curve — a fast initial chill to form a fine grain shell, followed by a slow, almost lazy decline through the brittle temperature range — cuts micro-crack rates by more than half compared to a simple linear cool. The trick is not to rush the middle third of the curve, where the metal is neither fully solid nor truly liquid.
One common mistake is treating every alloy as if it follows the same thermal script. A high-silicon aluminum behaves very differently from a low-carbon steel when it comes to shrinkage and hot tearing. For aluminum, the dangerous window sits between 500°C and 560°C, where the last 10% of liquid is trapped in a rigid network. Holding the casting at 520°C for even three minutes lets that trapped liquid redistribute and heal incipient tears. For steel, the risk shifts to the austenite-to-ferrite transformation, where a drop below 700°C too quickly can pull grains apart. The rule that survives every shop test: know the alloy's critical temperature band, slow the cooling exactly there, and ignore the temptation to speed up the rest of the curve just to get the part out of the mold sooner.
X-Ray and Dye Penetrant Checks Catch Flaws Before They Leave the Foundry
At the end of the casting line, a part may look perfect to the naked eye, but that doesn't mean it is. Foundries rely on two very different inspection methods to catch what sight alone misses. X-ray imaging peers through the metal, exposing internal shrinkage, gas porosity, or trapped slag that would otherwise hide until a load-bearing failure occurs. Dye penetrant testing, on the other hand, targets surface cracks and pinholes by drawing a colored or fluorescent liquid into any open discontinuity, then revealing the flaw under proper lighting.
These checks aren't a one-time formality. Operators calibrate X-ray tubes for each alloy and thickness, adjusting exposure time and angle to get a readable image of critical sections like valve bodies or pump housings. For dye penetrant, the sequence—clean, apply penetrant, dwell, remove excess, apply developer—must be timed precisely, because rushing the dwell period can leave a crack invisible. Good foundries document every image and indication, so a questionable area gets reworked or scrapped before the part ever reaches a customer.
The real value shows up in field performance. A casting that passes both tests has a much lower chance of leaking under pressure or snapping at a stress riser. That's why buyers in oil and gas, heavy equipment, and fluid power often insist on this combined inspection, even when the component's surface finish and dimensional checks are already within spec. It's a deliberate, low-tech-plus-high-tech gate that keeps bad castings from ever leaving the dock.
How Post-Cast Annealing Restores Corrosion Resistance After Welding
Welding invariably disrupts the passive film on stainless steels and other corrosion-resistant alloys. The more serious issue, however, is sensitization: during cooling from welding temperatures, chromium carbides precipitate along grain boundaries. This leaves adjacent areas depleted in chromium, the element essential for forming a protective oxide layer. As a result, the weld heat-affected zone becomes vulnerable to intergranular attack in aggressive environments.
Post-cast annealing addresses this by reheating the entire component to a temperature range where chromium carbides dissolve back into the matrix—typically between 1050°C and 1150°C for austenitic grades. Holding at this temperature allows chromium to diffuse uniformly, erasing the depleted zones. Rapid cooling, often water quenching, then locks the chromium in solution and prevents re-precipitation. This restores the alloy's inherent ability to passivate, effectively returning the welded area to its pre-welding corrosion resistance.
The treatment also relieves residual stresses introduced by welding, which can otherwise promote stress corrosion cracking. In practice, the benefit is most pronounced in thick sections or heavily welded fabrications where slow natural cooling would have allowed severe carbide formation. Although annealing adds cost and may cause slight distortion or scaling, its role in extending service life in chloride-bearing or acidic environments makes it a standard step for critical components.
Passivation Steps That Remove Free Iron and Stop Rust Before It Starts
Free iron left on stainless steel from machining, grinding, or fabrication is the starting point for most corrosion failures. Passivation works by removing that iron instead of covering it up. The first step is a thorough degreasing and cleaning cycle; any oil, cutting fluid, or shop dust blocks the acid from reaching the surface and creates uneven treatment zones.
The actual iron removal happens in an acid bath, most often nitric or citric acid. Citric acid has become popular because it chelates free iron selectively while leaving the chromium oxide layer intact, which makes handling and disposal much safer. Time, temperature, and concentration need to be tuned to the specific alloy. Too short a soak leaves iron behind; too long can etch the surface and weaken the base metal.
After the acid step, a clean water rinse stops all chemical activity and the part must be dried completely. Simple checks like a water break test or a copper sulfate spot test confirm that no free iron remains. Once clean, the surface re-forms its passive chromium oxide film on contact with air, usually within a few hours, creating a barrier that prevents rust before it can begin.
Designing Gates and Risers to Feed Shrinkage-Free Sections
Getting a casting to solidify without shrinkage cavities begins well before metal is poured. Gate placement has to support the riser strategy, not fight it. If a gate dumps hot metal into a thin section that freezes early, it can sever the feed path to a heavier boss. Route the gate so incoming metal keeps the feed channel open as long as possible, ideally entering through a riser or a heavy section that remains liquid late into solidification.
Riser size alone rarely solves shrinkage problems. The riser needs a live feed path and a thermal gradient that points back toward it. Chills or insulating sleeves can extend feeding distance and slow the riser skin. A frequent mistake is placing a riser on top of an isolated thick section with a narrow neck that freezes before the casting does; the riser looks full but contributes nothing. Check the modulus of each section and make sure the neck stays open longer than the part it is supposed to feed.
Prove the design on a few trial castings before locking the pattern. Cut sections through suspected hot spots, or use radiography if the alloy allows it. Adjust gate and riser contact areas based on what the first pour shows. Small changes, such as moving a gate a few millimeters, increasing a contact area, or adding a breaker core, can turn a persistent shrink defect into a clean, pressure-tight component.
FAQ
A lot comes down to how the melt is handled. Reputable suppliers use spectrometer checks on every heat to confirm chromium, nickel, and molybdenum levels before pouring, and they keep records tied to each batch. That traceability catches off-spec chemistry before it becomes a cracked valve body or corroded pump housing.
Investment casting tends to win for complex stainless parts because the ceramic shell gives a smoother surface and tighter dimensional control. It reduces the need for heavy machining, which means less chance of exposing subsurface porosity. Some shops also pair it with vacuum or controlled-atmosphere melting for reactive grades.
Gating design matters more than people think. By simulating metal flow before cutting a mold, foundries can place risers where shrinkage actually occurs instead of guessing. That cuts internal voids while keeping yield high. For critical parts, adding hot isostatic pressing as a final step closes up anything too small to see.
Radiographic testing is the workhorse for internal soundness, but liquid penetrant testing catches surface cracks that X-ray can miss. For parts in corrosive service, we often add a ferrite content check because too much ferrite can hurt corrosion resistance even if the casting looks perfect.
Both. Solution annealing dissolves carbides that form at grain boundaries during cooling. If you skip it on 316 or duplex grades, you get chromium depletion right where intergranular corrosion starts. The temperature and quench speed have to match the alloy, or you're creating a weak layer under an otherwise good casting.
Pickling and passivation are not optional if the part sees moisture or chemicals. They remove free iron and scale left from casting, then rebuild the passive chromium oxide layer. For high-purity applications, electropolishing goes further by smoothing micro-peaks where bacteria or chlorides can settle.
Avoid sharp corners where stress concentrates, and keep wall sections uniform so the metal solidifies evenly. A good foundry will push back on a drawing if a boss or flange creates an isolated heavy section - that's where shrinkage tears start. Small fillets and gradual transitions add years to fatigue life.
Beyond lab corrosion tests, we run cyclic pressure or thermal shock tests on sample parts from the same lot. For marine or chemical service, exposing test coupons to the actual environment for a set period gives a real-world read on pitting resistance. If a grade fails that, we change the alloy before production.
Conclusion
Getting stainless steel castings to hold up under stress starts with controlling the alloy itself, not just the mold. A tight balance of chromium and nickel is what keeps the metal sound during solidification—too little nickel and you invite cracking along grain boundaries; too much and you lose the strength that makes the grade worth using. Pouring temperature matters just as much, because a slightly lower pour with a controlled cooling curve can stop micro-cracks from forming in the first place. And before any part leaves the foundry, X-ray and dye penetrant checks catch subsurface porosity or surface flaws that would otherwise show up later in service.
Durability doesn't end at casting—post-cast annealing after welding restores the corrosion resistance that heat can destroy, and a proper passivation step removes free iron from machining or handling so rust never gets a foothold. Even the gating and riser design plays a quiet role: feeding the casting correctly means thick sections solidify without shrinkage voids. When all of these steps are treated as one continuous process rather than isolated fixes, the result is a stainless part that holds its shape, resists corrosion, and lasts far longer than a shortcut would allow.
Contact Us
Contact Person: Paul
Email: [email protected]
Tel/WhatsApp: 8615067447509
Website: https://www.spironcasting.com